OpenGL ES 00 - Xcode Project Set Up
Since the original website of Simon Maurice seems not available, many people have been searching for this cool tutorial. This one is pretty good to start learning Open GL ES for iPhone programming . It gives a detailed explanation for every code and also gives sample source codes. Hope it may help you. All the best!
Disclaimer: This
post and the whole blog is just a copy of
iPhone-OpenGL-ES-tutorial-Series (seems to have )written by Simon
Maurice. This blog does NOT have a written permission or any kind of
permission from the original author (Simon Maurice). Please use it at
your own risk. If you have any complaints regarding any content of this
blog, please let me know I will remove it right away. Just hoping that
it would be helpful for people who are trying to learn OpenGL. Happy
coding!
Copyright 2009 Simon Maurice. All Rights Reserved.
The code provided in these pages are for educational purposes only and
may not be used for commercial purposes without Simon Maurice’s
expressed permission in writing. Information contained within this site
cannot be duplicated in any form without Simon Maurice’s expressed
permission in writing; this includes, but is not limited to, publishing
in printed format, reproduced on web pages, or other forms of electronic
distribution.
Source codes can be found here
OpenGL ES on the iPhone is a cinch to set up with Xcode, especially since Apple introduced the template with the SDK release. All we really need is a place where you can get to and start adding in code quickly and easily. This is what we’re going to do today.
To be quite honest, I really don’t think that it’s necessary to type everything in from this and if you just want to get into the meatier OpenGL tutorials which follow, skip this by all means. In this case, there’s nothing wrong with skipping the set up as I’m not going to go into the detail of it. Just head down to the end of this tutorial and download the project file.
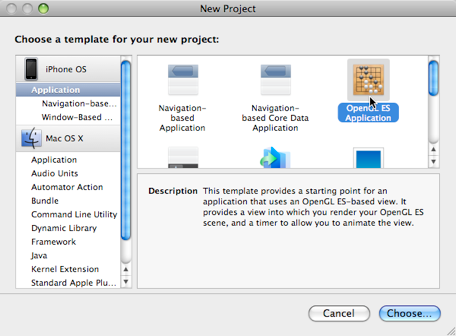
Start by firing up Xcode and creating a new project. Choose the template called: “OpenGL ES Application” (Figure 1) and save the project somewhere convenient for you.
OK, I’m going to assume at this point that you’ve probably already had a quick look around this template at some point in the past, probably had a look at the running application. What we’re going to do is to remove the code for the spinning coloured square and convert the view to use a depth buffer (ie make it “true” 3D). This will give us a space for our tutorials.
2D in a 3D Space
Like this Apple template, most OpenGL tutorials start off by ignoring depth, usually using a 2 point co-ordinate system (X, Y) rather than the more standard 3 co-ordinate system (X, Y, Z). You may have noticed that the vertices for the square in Apple’s template only uses the (X, Y) co-ordinates, that’s because they are not using depth!
This is called Orthographic projection. As the goal of this tutorial series is to get you to 3D, I’l not going to cover orthographic projection at this point; maybe later in the series but for now, we’re going to keep heading into 3D.
Enabling Depth Buffer
The first thing we need to do is to enable the depth buffer. Apple’s example square is only a 2D object so doesn’t actually need a depth buffer. We need depth so we’ll enable it. Apple has kindly provided the code to setup the depth buffer so we’ll just take advantage of it.
Open EAGLView.m in the editor and look for the following line:
#define USE_DEPTH_BUFFER 0Needless to say, change that 0 to a 1. This will turn on the code in the view setup area to create the depth buffer. This code is contained in the createFrameBuffer method. Don’t worry too much about this method at the moment. It’s written by Apple so just accept it does what it’s supposed to.
Now, we need to enable depth testing within OpenGL. To do this, we do need to create a new method which will be called once to enable our view to work. Start by creating a new method called setupView and insert the following code into this new method:
- (void)setupView {
   const GLfloat zNear = 0.1, zFar = 1000.0, fieldOfView = 60.0;
   GLfloat size;
   glEnable(GL_DEPTH_TEST);
   glMatrixMode(GL_PROJECTION);
   size = zNear * tanf(DEGREES_TO_RADIANS(fieldOfView) / 2.0);
// This give us the size of the iPhone display
   CGRect rect = self.bounds;
   glFrustumf(-size, size, -size / (rect.size.width / rect.size.height), size /
(rect.size.width / rect.size.height), zNear, zFar);
   glViewport(0, 0, rect.size.width, rect.size.height);
   glClearColor(0.0f, 0.0f, 0.0f, 1.0f);
}
All this code does is set up the conditions in which OpenGL will operate by creating a View Port which will be mapped to the actual size of our display. Like I said, I’ll go into detail about this later on but for now, just take note of the following:
glEnable(GL_DEPTH_TEST);
This enables the Depth Testing in OpenGL. You need to remember that once you turn something “on” in OpenGL, you need to turn it off later if you don’t want to continue using it. As we will only turn on depth testing and never turn it off, it can go here in the view setup.
glClearColor(0.0f, 0.0f, 0.0f, 1.0f);
What we’re doing here is defining what colour to use when we clear the screen. All colours in OpenGL ES must be RGBA values (ie Red, Green, Blue, Alpha), and cannot just be RGB values as in OpenGL. So, later on when we clear our screen, OpenGL ES will already know we want it cleared in a black colour. It will continue to use this colour until we change it.
The colour values can be 0 -> 1 if using floating point or 0 -> 255 if using unsigned bytes. The higher the value, the higher the colour intensity.
OK, back to the top of the file and find the #define we had changed earlier. We just need to install a macro here which is needed for the setupView method we just inserted.
#define USE_DEPTH_BUFFER 1
#define DEGREES_TO_RADIANS(__ANGLE) ((__ANGLE) / 180.0 * M_PI)
Draw View - The drawing method
Now, go down to the drawView method. This is where everything happens in our tutorials. You can see here where Apple has even given us a pointer to the fact this is where we’re going to be doing our work.
First of all, delete everything in this method, and replace the contents with the following code:
- (void)drawView {
   [EAGLContext setCurrentContext:context];
   glBindFramebufferOES(GL_FRAMEBUFFER_OES, viewFramebuffer);
   glViewport(0, 0, backingWidth, backingHeight);
   glBindRenderbufferOES(GL_RENDERBUFFER_OES, viewRenderbuffer);
   [context presentRenderbuffer:GL_RENDERBUFFER_OES];
}
The first three lines of the code above, just sets up our drawing space. The last two lines swaps our drawing space with the space which is currently viewed on screen. If you’ve ever done animation or game programming before, you’ll know that this is what’s called “double buffered”.
For those who don’t know, what this means is that we create two identical buffers: one which is displayed to the user, the other is cleared and we draw on it. When we finish drawing, we swap the views so the user sees the new view. The reason why we go to all this trouble is to make the animation smooth.
We’re not going to add any more code to make this display anything at the moment, we’ve still got some more set up to do.
Firstly, right before the dealloc method, insert the following code:
- (void)checkGLError:(BOOL)visibleCheck {
   GLenum error = glGetError();
   switch (error) {
       case GL_INVALID_ENUM:
           NSLog(@"GL Error: Enum argument is out of range");
           break;
       case GL_INVALID_VALUE:
           NSLog(@"GL Error: Numeric value is out of range");
           break;
       case GL_INVALID_OPERATION:
           NSLog(@"GL Error: Operation illegal in current state");
           break;
       case GL_STACK_OVERFLOW:
           NSLog(@"GL Error: Command would cause a stack overflow");
           break;
       case GL_STACK_UNDERFLOW:
           NSLog(@"GL Error: Command would cause a stack underflow");
           break;
       case GL_OUT_OF_MEMORY:
           NSLog(@"GL Error: Not enough memory to execute command");
           break;
       case GL_NO_ERROR:
           if (visibleCheck) {
               NSLog(@"No GL Error");
           }
           break;
       default:
           NSLog(@"Unknown GL Error");
           break;
   }
}
OpenGL has an error checking method as called above (glGetError()) but the error code returned needs to be manually converted to a human readable message from the error code. That is what the above method does.
The BOOL parameter “visibleCheck” is only there so that sometimes you can check and see that the routine was called and when there are no errors.
The last thing we need to do in EAGLView.m is to go to the initWithCoder method and actually call the “setupView” method we created earlier. Below the setting of the variable “animationInterval”, insert the following to call the setupView method:
[self setupView];
Note of course that we could have put the setupView method’s code in the initWithCoder method rather than create a new method, as generally it’s only ever called once.
OK, done in EAGLView.m; Switch to EAGLView.h!
EAGLView.h
Fortunately, there is not much work to be done here. All we need to do is to create the prototypes for the two methods we created as follows:
- (void)setupView;
- (void)checkGLError:(BOOL)visibleCheck;
And that’s us done for this tutorial.
Next Steps...
If you were to build and run this in the simulator, you’d just get a blank screen and nothing interesting would happen. In the next tutorial, we’re going to start drawing primitives on the screen, primitives are just basic drawings like points, lines and triangles.
For those of you who just want to download the project files and not type it all in, here it is:
AppleCoder-OpenGLES-00.zip
The home of the tutorials is in the “Tutorials” section of the iphonedevsdk.com forums. Check out the thread there.
Until then, hooroo!
Simon Maurice
Copyright 2009 Simon Maurice. All Rights Reserved.
The code provided in these pages are for educational purposes only and may not be used for commercial purposes without Simon Maurice’s expressed permission in writing. Information contained within this site cannot be duplicated in any form without Simon Maurice’s expressed permission in writing; this includes, but is not limited to, publishing in printed format, reproduced on web pages, or other forms of electronic distribution.
Linking to these pages on other websites is permitted.
No comments:
Post a Comment